
Connect Stripe and invitees pay by card on your booking page before the appointment is confirmed. The money goes straight to your Stripe account. DaySchedule doesn't add a transaction fee.
Connect your Stripe account
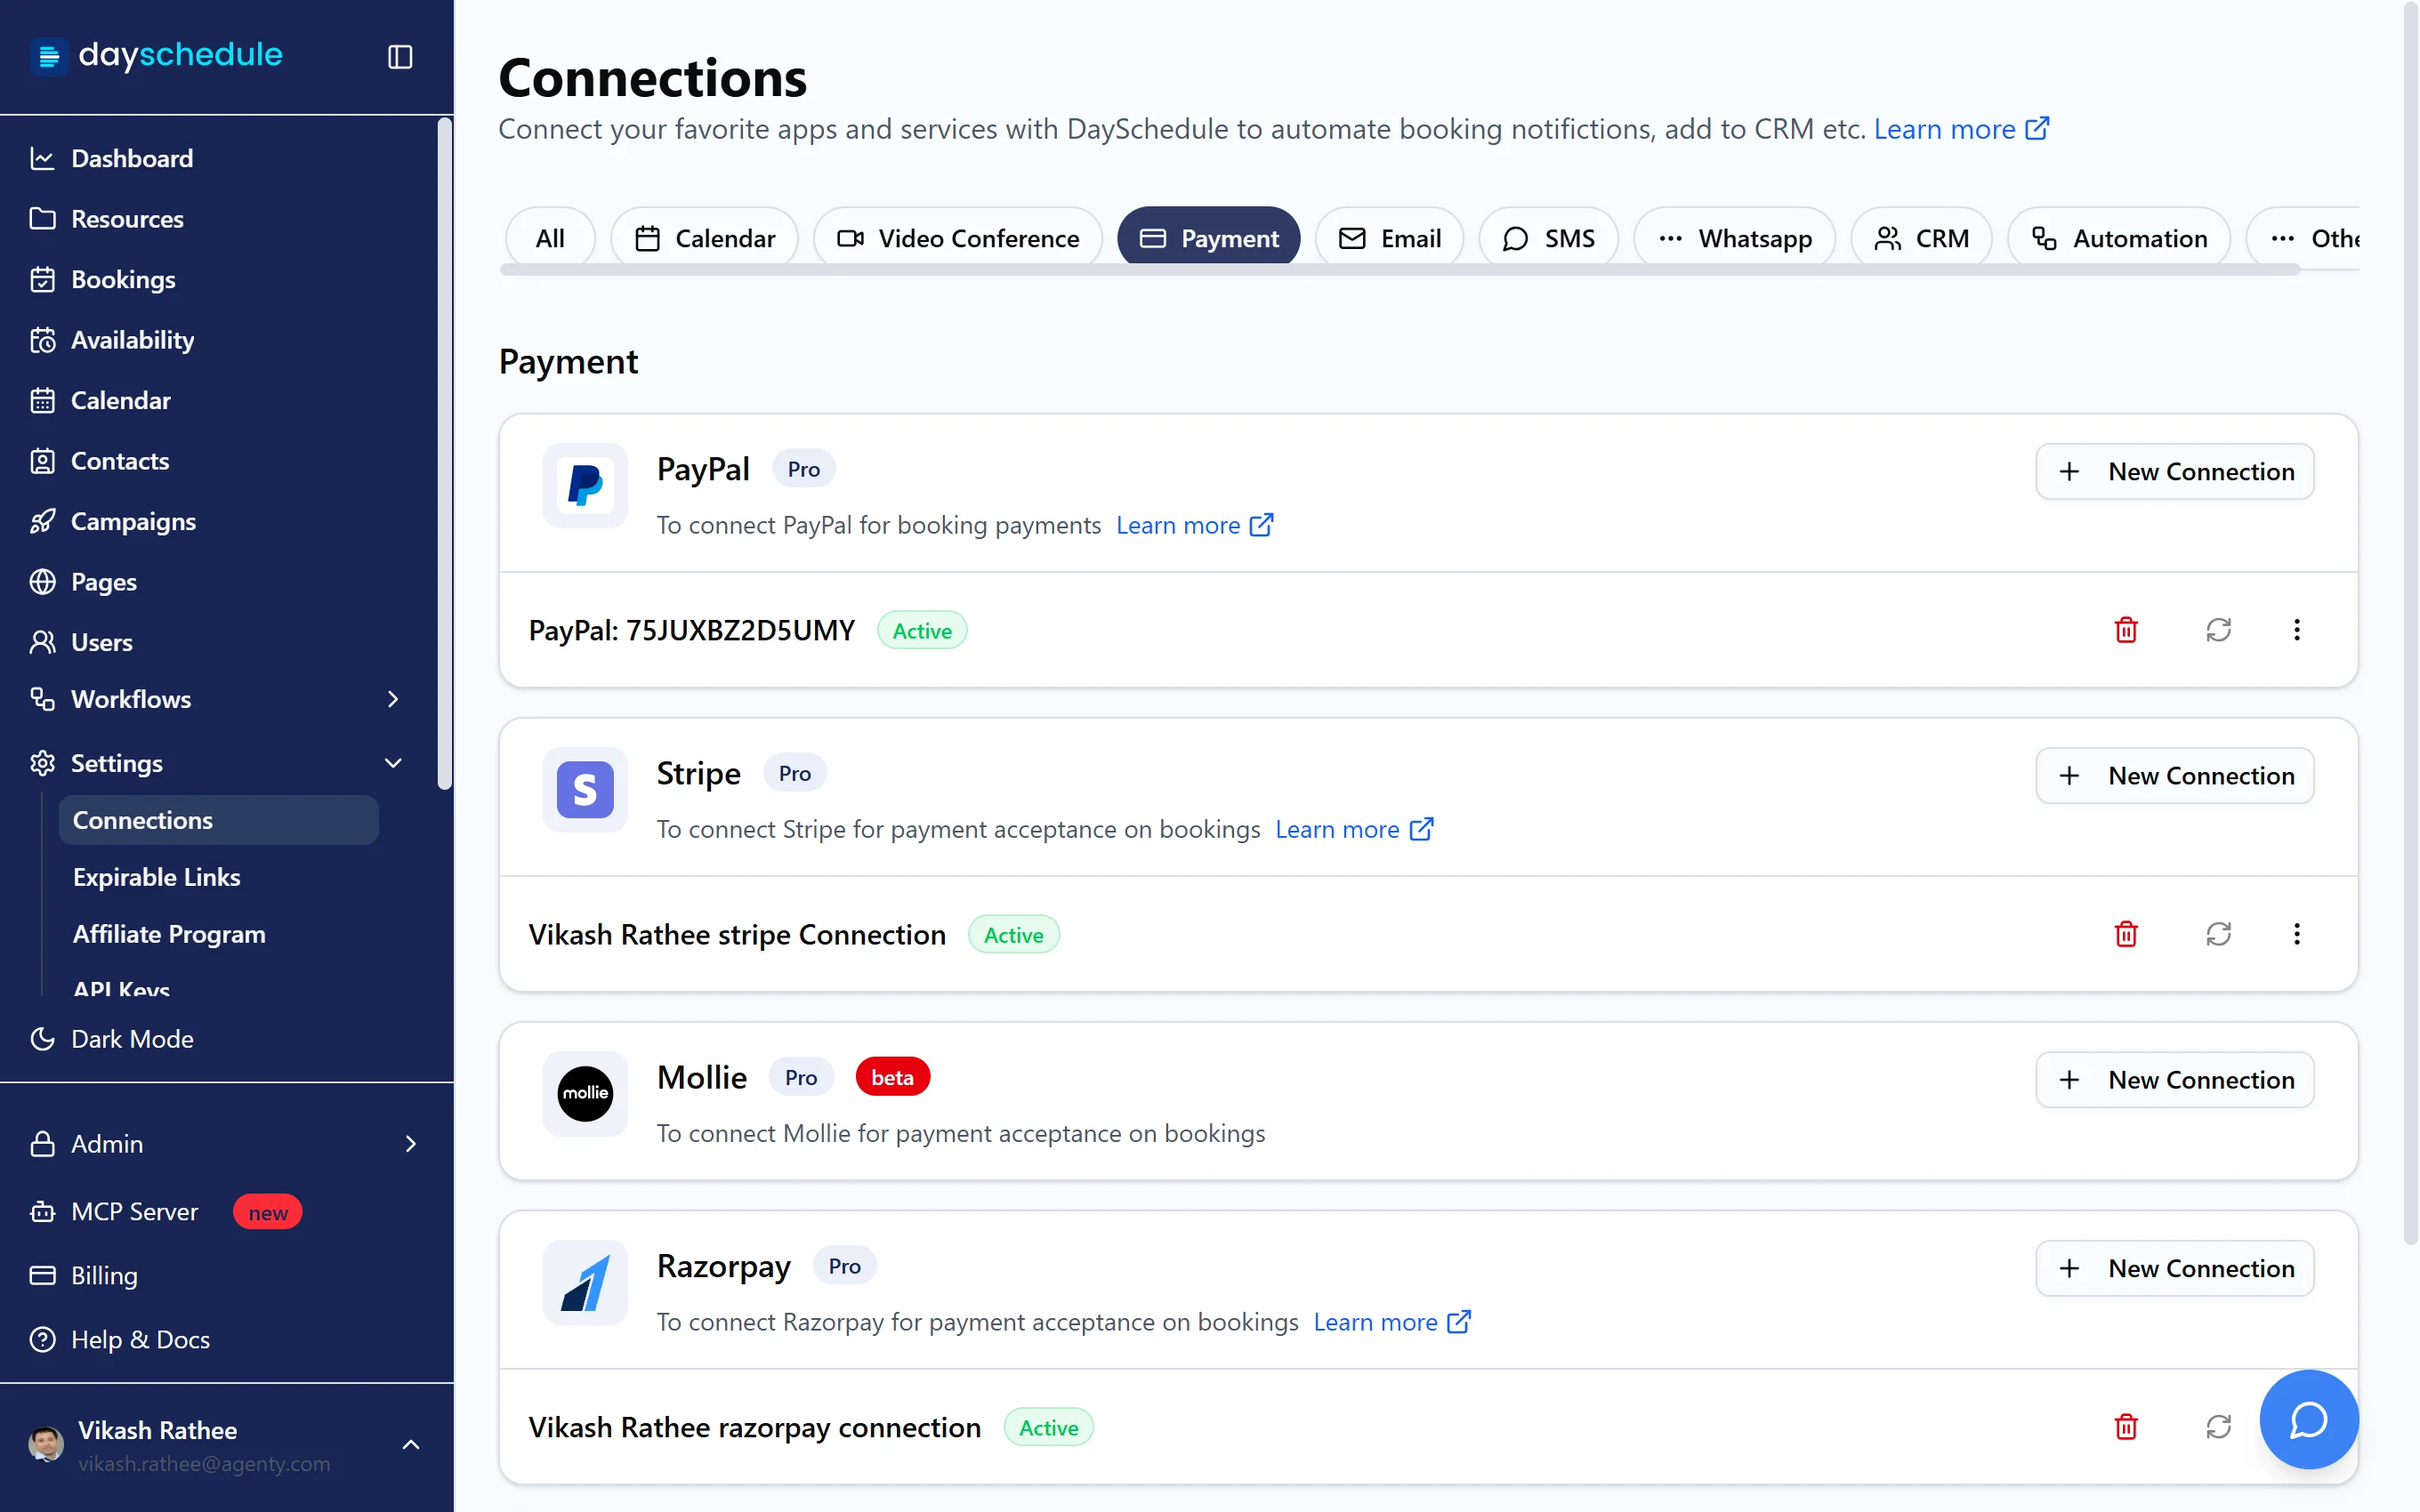
- Open Settings, then Connections, and select Payment.
- Find Stripe and click New Connection.
- Sign in to Stripe, choose the account to connect and approve access.
You return to DaySchedule with the connection listed under Stripe as Active. Stripe needs the Pro plan.
Charge for an event
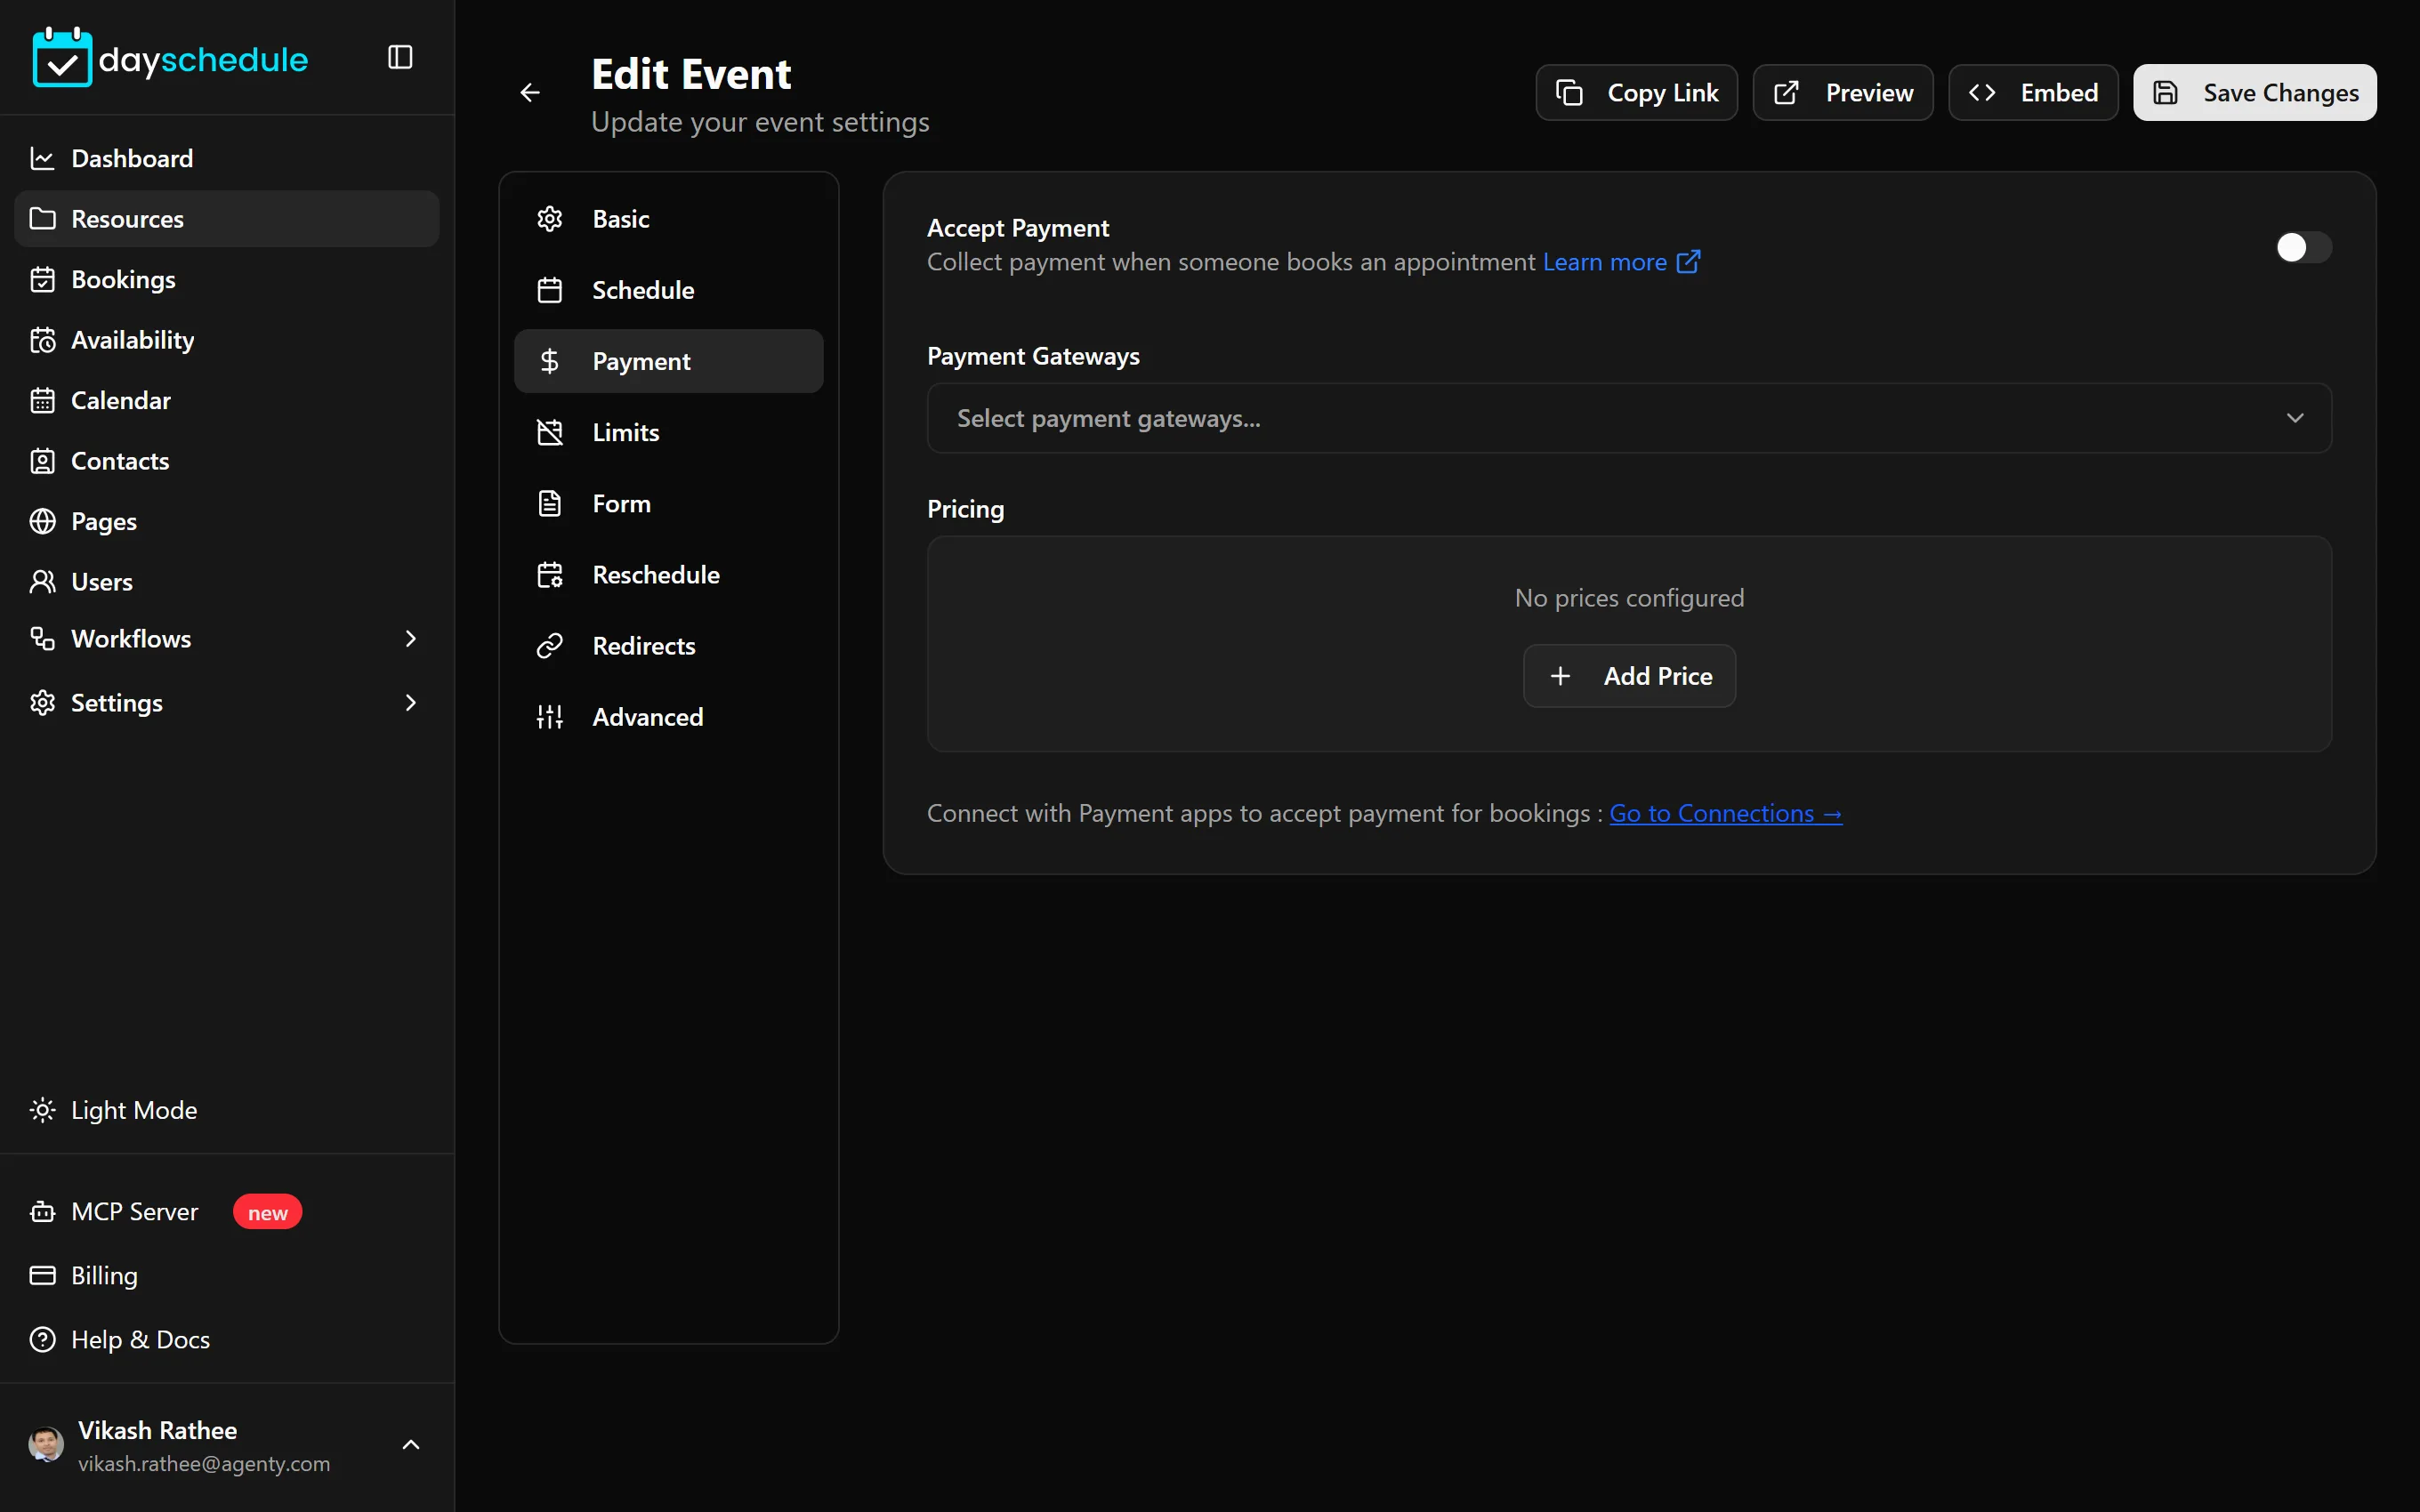
- Open the event from Resources and select the Payment tab.
- Turn on Accept Payment.
- Under Payment Gateways, select your Stripe connection.
- Under Pricing, click Add Price and enter a name, the currency and the amount, such as "Consultation, USD, 80".
- Click Save Changes.
The invitee picks a time, fills in the booking form and pays with Stripe. The booking is confirmed once the payment succeeds. Add more prices to offer options, such as a 30 and a 60 minute session. If you also select PayPal or Razorpay, invitees choose how to pay.
Find a payment
Open the booking from Bookings. The invitee's Payment Details show the Amount, Payment Gateway and Transaction Id. Search for the transaction ID in your Stripe dashboard to see the charge, the fee and the payout.
Refunds are made in Stripe. Cancelling a booking in DaySchedule doesn't refund the payment, so refund it from the payment in your Stripe dashboard if your cancellation policy allows it.
Change or remove the connection
Use the menu on the connection to rename it, the refresh icon to sign in to Stripe again, or the delete icon to remove it. Events that only use that connection stop taking payments until you select another gateway on their Payment tab.